Gardens.

Alright. Let’s start at the beginning.

Shortly after the lockdown happened, we started trying to spend more and more time outside as a family. We can add to that the initial food-instability we were feeling, and before I knew it my better 3/4 bought a garden-in-a-bag off Amazon. A mylar envelop showed up full of tiny bags of seeds- labeled, sort of. They said things like “Pumpkin” and “Tomato” without any information about type or needs. Ok.

So: We knocked together 3 4′ x 4′ raised beds, filled them mostly from our compost/yard waste pile, and jammed the seeds in. A bit of watering and off we went.

The results were… crazy. Nearly everything came up (minus the Chives and most of the Basil), and we had huge yields. Arugula, lettuces (red, romaine, and butter), peas, broccoli, cauliflower, cucumbers, red cabbage, tomatoes, cherry tomatoes, jalapeños, banana peppers,  cayenne peppers, bell peppers, carrots, watermelons, cantaloup, radishes, and pumpkin all came up. And we got results from everything except the brassicas- the cabbage moths got those. All that from three tiny raised beds. Oh, and when we found some sprouted onions and potatoes in the pantry, we planted those, too. And they grew (the onions eventually went into a pot roast we made).

Besides the food, the time in the garden was very good for all our health. There was always something to putter with- weeding, picking, spotting new growth, and watering. It was relaxing and it was outside. It was amazing. It looked and smelled beautiful.

On the heals of that success, we’re ramping up for next year. Here’s the current plan:

  1. New seeds. We’ve bought seeds from a serious supplier, and we’ve picked some stuff we’re really excited to grow. Hopefully better varieties than last year. Plus we’re planning more onions, potatoes, and we’re planting an apple tree too. At least. Maybe a kiwi or fig tree, too.
  2. More beds. We’re upgrading to 6 4′ x 8′ beds. And we’re keeping the original three small beds as an “experimental” area. There are some allium bulbs planted there already, for example. Also, I’m going to rip up 50% of our large front yard. That’ll get seeded with a bunch of native wildflowers and be the space for the pumpkin plants (and maybe the watermelon) to run rampant.
  3. Much earlier indoor seeding for some plants. Tomato, melons, pumpkins, and peppers will all get started much earlier indoors under grow lights. We ran out of season before we got full yields, and this should help with that a lot.
  4. Planting flowers as well- to hopefully attract more pollinators and spice up the joint a little, too.

We’ll see, I suppose, if all these plans work out. It’s a lot (the fencing alone is a project), but I’m hoping the eventual relaxation it affords is worth it.
Peter Mooney

This slideshow requires JavaScript.

I had this bike built by Peter in about 1996-7. It’s still a prized possession of mine, and I’m very happy to finally be back to riding it (after a few years off with kids…). This bike, 20 years later, still represents a platonic ideal of a road racing bike. I know things have moved on- compact geometry frames, disc brakes, Di2, tubeless, whatever. But for me (as a product of my time and upbringing), this bike is what I look for in a road bike.

For the tech geeks that might be reading:

The front triangle is Reynolds 853 brass brazed with 3Rensho lugs. Fork is an internal Cinelli crown with Suntour Track dropouts. The rear triangle is Columbus EL/OS silver brazed to Henry James stainless dropouts. It’s a full blown race bike, so the 26mm Compass tires are at the very hairy edge of what will fit. Gruppo is 8spd Campy (a mix of Record and Chorus), and I built the wheels with Mavic OpenPRO CD rims, DT Revolution spokes, and alloy nipples. Headset is a two-tone Chris King, stem is Salsa steel, bars are ttt with Neuman tape. Campy seatpost with a Selle Italia Flite Ti, seat roll by me. Pedals are painted Shimano DuraAce Look compatible.

Bridgestone MB-3


This slideshow requires JavaScript.

I got this bike in high school, around 1994 or so. Actually, it wasn’t this bike- it was a teal MB-4. It was a gift, and a way to get me to stop borrowing and breaking my mother’s MB-5. I broke a chainstay on the original bike a year or three later, and this was my warranty replacement frame and fork. That was a bit of luck, too, because by that time Bridgestone had pulled out of the US, and I had to track down the former rep and see if he had a frame around that he could give me. He did, and I’ve ridden this bike ever since.

Originally, of course, it was built up as a regular mountain bike. The sub-genres of bikes we have now weren’t yet a thing, so that meant it was setup for twisty technical New England singletrack. Think: narrow flat bars, toe clips, 2″ tires inflated to 35 psi, and a rigid fork. Classic. The build evolved over time (and as I broke things), but it was pretty much always setup for trail riding.

Then, I went away to college and needed to bring a bike. I took this, and before I went I put 1.5″ slick tires on it, got rid of the granny chainring, and added toeclips. It became my first commuter bike. Around 1999, I bought a Specialized Stumpjumper Pro, and that became my “good” mountain bike. The Bridgestone morphed into a single speed (32 x 16… remember when that was the thing?), and stayed that way for years. I raced cyclocross on it a few times like that with the addition of Conti Cross Country tires in 1.5″. As I got older and had my own children, the bike turned into a seven speed burrito slayer- single chainring, front rack & basket, flat pedals. Built for pedaling on bike paths with kids.

I’d been toying with the idea of putting 700c wheels on it- apparently they’ll fit (sorta?) and you can run adaptors to get the brakes to work… but I didn’t have any spare 700c wheels lying around, so I thought I’d test it out for gravel with the existing wheels. I swapped the bars and stem, got some vintage Dura Ace STI levers, re-geared it (and added a front derailleur for the first time since 1998!), and refinished a saddle to match.

It’s my “gravel” bike, now- and it’s totally in it’s element. The handling and frame still feel excellent, and the drivetrain works beautifully for the terrain I ride here. Eventually, it might be fun to see how 650b wheels look in there (the brakes don’t require an adaptor for those- I’m unsure of the tire clearance, though), but it’s pretty sweet as-is. I suppose a slightly narrower/lighter tire would be cool too, but that’s really just splitting hairs.

So there you go- a 24 year old bike that’s still finding new ways to be useful and wonderful. Long live the Bridgestone.

Studio Re-Design (part 1, the before)

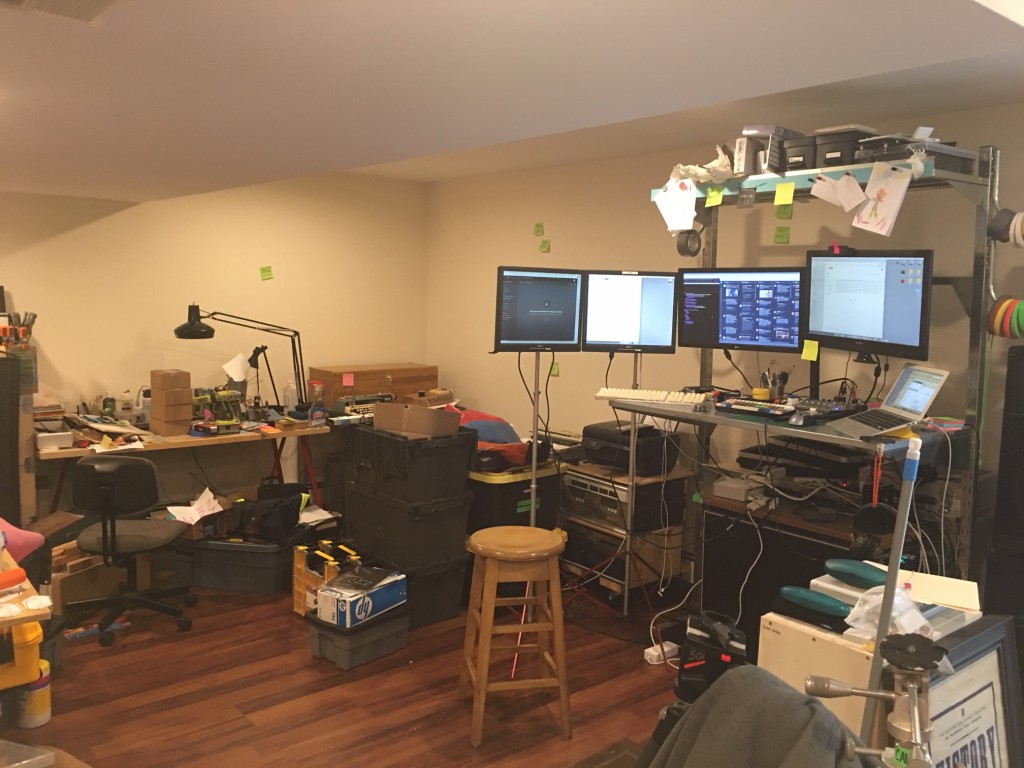
I’ve been yammering on for weeks about the work I’ve been doing preparing to rework the studio/home office, but it occurs to me I’ve hardly broached either the why or the how of all that. And I’ve skimped on pictures, too. So let’s fix all that.

The current space looks (more or less) like this:

Studio before.

Yowch. That’s not pretty. To be fair, there’s a bunch of stuff prepped in those bins for the install, so it’s a fair bit more cluttered than “normal” right now. But still.

I’ll break down part of what you’re seeing. On the left far wall- that’s all analog stuff. Sewing, typing, book binding, soldering, crafting… all that stuff happens over there somewhere. There’s about eight feet of desk there between the two tables, but it’s crowded and not great. The right side is all digital stuff- that’s some rack gear on the ground, four monitors (for two different machines), and a laptop. And another rack underneath. And it’s a hot mess of cables and clutter. No good.

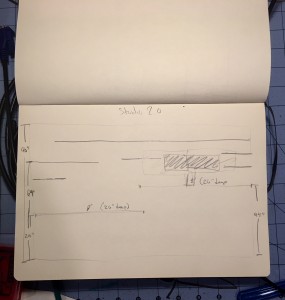
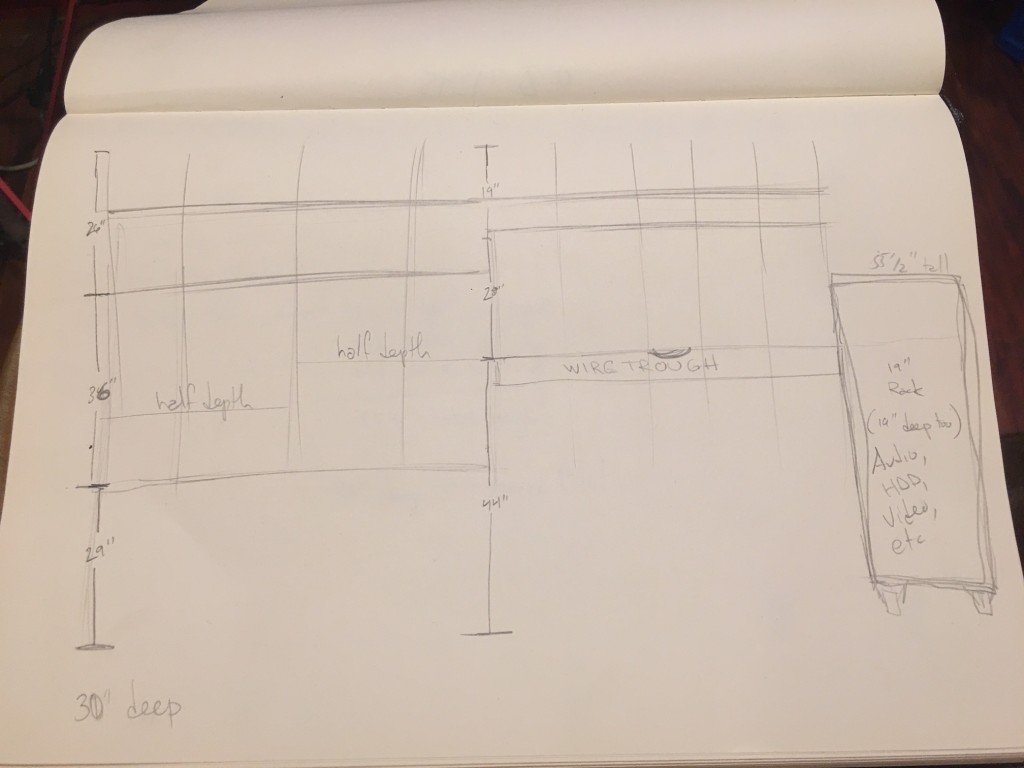
The plan is something like this (all along the right hand wall):

IMG_3897

In case you can’t read my writing, that’s two seven foot desks (with a bit of overlap) mounted to the wall, and a freestanding (on casters!) 28u rack on the far right. That extends my computer standing desk from just under four feet wide to seven, and adds a considerable amount of storage above for all the other supplies I need to keep around.

The 28u rack I’ll be building is 30″ deep, too- so it’s going to get all the audio, video, and computer gear I have strewn around. All the hard drives. All the dead media format devices (VHS!) I keep around. All of it, in one place, neatly. Both computers go in there, too, along with (I imagine) the in-the-mail NAS I’m putting together.

I’ve got most of a parts list (and most of the cut-list, too), but I need to take some more measurements and finally do a proper scale drawing of the whole thing (with markings for the studs in the wall) to know exactly how many brackets of which type I need to buy. And then there are a couple of specialty parts (24″ shelf brackets, 28u rack mount rails, etc) that need to be special ordered, so I’ll have to get those en route.

So that’s where I’m at: an hour with the stud finder and some tape away from a full shopping list. Then it’s time to mount stuff to walls, cut and glue a bunch of shelves, and get going on the rack case.

Projects

This is less an update on status (my standard SitRep posts), and more some smaller look at how I manage some my projects. Just a small look, mind you.

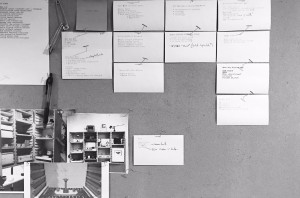
IMG_3804This is a (partial) look at my project board- anything that I’m even thinking of making. It gets added to an index card, and pinned up. I (usually) organize them by category (bike, house, clothing, etc), but I shuffle them pretty often to see if anything lines up or can be batch processed. From here, these cards get filed as “finished” when the project is completed or “abandon” when I decide it’s not something I want to pursue. Every once in a while, on the rare occasion I’m feeling dry creatively, I sometimes paw through the “abandoned” cards for inspiration- I almost never re-up a project as-is.

For projects involving building, I usually spend some time sketching before I begin work. I have a couple of notebooks, depending on the scale I need, but this example is from my largest. It’s done in pencil, and it’s deliberately loose right now. I had the idea to overhaul my studio into a more functional space- that IMG_3820means more desk space and more storage, all while looking a bit less hodge-podge than things currently do. I’ll be installing a massive (16′ long!) work-wall, with (double) vertical desks build in- plus more shelving storage, cable management, and lighting. It’s about as big a project like this as I’ve taken on, and I know (based on finishing requirements) that I won’t be doing much until I can work in the garage again- the stain and polyurethane don’t like below freezing temps. But: I’m spending between now and then sketching and sketching and thinking to get the plans as solidified as I can, so when the temps finally break, I’ll be able to get right to work. So, for now, the sketches live here, and I’ll be revising and adding detail as I go. It’s the thinking that’s important, as it’ll make the construction go far more quickly, be less expensive, and better fit my ultimate needs.

So: between the board (to see the full range of the projects that are active) and the notebooks (for project details, sketches, equipment buy lists, etc), I find I manage to keep a reasonably good eye on what project is on which burner. For stuff I’ve never done before (like this studio 2.0 project), there’s a much-needed hibernation phase. I need the time to think through iterations on projects so I don’t have to build as many physical iterations. For some stuff (like my long suffering shoulder bag project, currently on prototype #5), that build/test/build is a normal part of the process- but when I can (and especially for larger stuff like this), I need to minimize the number of physical revisions.

Sketching

If you’re the one person who follows my SitReps here, you might be aware that I’v been working on designs for a new shoulder bag for some time. I’ve been edging steadily closer for the last few months, but it’s never come fully to the front of my list of projects.

It is now.

I’d like to have it ready for the Autumn, but that means starting to work on it now. It’ll take time to get materials in, make patterns, cut & sew, and finish. If I don’t start soon, I won’t be ready for the cool weather.

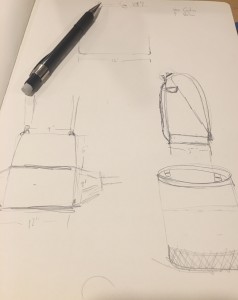
So the other night I sat down in the basement studio to sketch some- I had some ideas and design criteria, but I wanted to flesh things out. I’ll need detailed dimensional drawings soon, but first I need to understand the construction. Pencil and paper in hand, I got to work. Which is when the eldest child (8.5) rolled up next to me on her own chair to “help.”

Shoulder bag sketchesAnd you know what? She totally did. She started asking really interesting questions about how things would work and how the bag should look and behave. And as I drew, she kept asking these amazing questions- and the sketches kept coming and getting better. And now, after a bit of that, I’ve got the best design I’ve come up with in a good long while. It’s amazing what someone unafraid of asking questions can do for the creation process.


New Keyboard

My obsession with mechanical keyboards continues.

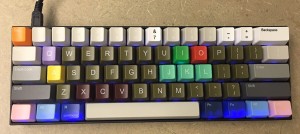
My long-awaited 60% keyboard finally showed up (after the now-standard tomfoolery of DHS + USPS for delivery), and the first thing I did was rip all the key caps off install the set I got custom made from WASD Keyboards. It looks lovely now, and I’m very happy to be using it.

V60 w/ Custom Key Caps

I’ve not given up on my hand-wired monstrosity, either. It’s wired and has an “enclosure” and whatever, but I’ve been stalled for time with building out the custom firmware it needs to run. So it’ll wait a bit on that one. No rush.


obsessions.

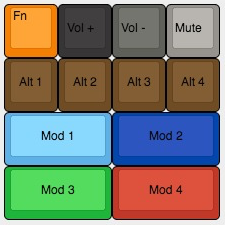
The obsession with mechanical keyboards that I seem to have developed is… troubling. To the degree that I’m thinking about building a macro-specific keypad Keypad Layoutfor a number of the repetitive tasks that I handle on a regular basis. So, for example, one layer of this keypad would make the Mod 3 and Mod 4 keys the Edit In and Edit Out commands in FCPX, with the Mod 1 and Mod 2 maybe triggering transitions or media imports. Alt 1 would be to show video scopes, and so on. Then, with another layer, Mod 3 and Mod 4 would become Cut and Paste (in a single key press), with other keys (maybe) being mapped to insert small batches of heavily used HTML. Or something. Regardless, I’m figuring out parts lists and where to order key caps and switches and whatnot. AND how to get a Teensy 2.0 to act like a keyboard and handle all the macros and whatnot. All doable, mind you.


I bought a new computer.

Ah, so. The time had come.

My “current” computer is a very (10!) old MacBook Pro- it’s been great, but it’s gone all glitchy, and keeping it up and running has become entirely too time consuming- and inconsistent. I’ve written before about my affinity for Plex as a media serving solution, and this machine had been pulling Plex Media Server duty. It’s gone so flakey that it can’t be relied upon for that anymore, so it was clearly time for something new.

Or, I should say, new-er. I had planned to ante up and grab a 27″ iMac Retina of some flavor- by all accounts a lovely machine. It’s minimally user-serviceable, though, and the most you can really do is upgrade the RAM a bit. And: $1500 base price. So I also looked at a Mac Mini, but the price of those can be stiff, and they’re not user upgradable anymore, so… used? Nope- they hold value like crazy, and you’re effectively better buying a new one. So that’s out. And I don’t need the portability of a laptop.

Enter: Xserve. They dropped this line in 2010, but these were rack-mounted Macs meant for use in data centers. They are proper servers, too: dual redundant power supplies, lots of space for disks and RAM, dual gigabit ethernet, etc etc etc. I bought one on ebay, and it should be here early this week. Mine’s from 2008, and you might be thinking that I’m nuts to have bought an eight-year-old machine, but let me point out a couple of things:

  1. It’s faster than the iMac I might have bought- mine has 2x 3.0ghz quad-core Xeons, and the benchmarks for the machine are still pretty quick. It’s roughly a 6x improvement over my existing machine.
  2. It’s got plenty of RAM- mine has 16gb, but it’ll handle (at least) double that.
  3. It’s got space for 3 hard drives. Mine has 3x80gb, but I’ll eventually swap that to 3x2tb, so I’ll have 6tb of internal storage.
  4. It has an internal super drive (HA! well, useful for ripping existing parts of my DVD collection…)
  5. I paid $200 for it. Plus $90 for shipping, since the thing’s a TANK and is coming from the west coast.
  6. It’s entirely user serviceable. All the parts can come out and be swapped- it’s a industrial computer, after all.

Some downsides, of course:

  1. It eats power. It idles at 150W or so, but I’ll be running it on a scheduled boot/shutdown cycle to minimize that problem.
  2. Officially, it’s only supposed to be able to run 10.6.8 as an OS. Really, though, it’ll run 10.11.x without any real trouble- Apple dropped support for it’s video card, but I’ve got a much more modern card en-route that will fix that issue.
  3. It’s huge and rack mounted- but I don’t care, as I have a rack in the basement anyway.
  4. It’s loud under load- again, irrelevant, as it’s in the basement, and I’ll be managing it via screen sharing remotely anyway.

I’m excited. It’s been a very long time since I had a proper work-horse of a computer, and it’ll be nice to finally have my data and projects all consolidated onto one capable machine. The next stage will be monitors for it- the new video card will push 2650×1600 resolution, but I can’t figure out of that’s across one screen, or if that’s each on two screens. Whatever- it’s enough either way, really. I’ve got a 24″ 1920×1080 kicking around that’ll do in the meantime.

I figure even if I only get a few more years of life from it (which, honestly, seems unlikely- these were built like brick houses, so it should keep ticking along), it’ll still have been less expensive than an iMac, and I’ll have roughly the same speed and power, so that’s a bonus. And, given the price, if I want a “couch computer” for browsing, I can grab an iPad or Chromebook or whatever, and still have the total cost be less than an iMac.