I’ve been yammering on for weeks about the work I’ve been doing preparing to rework the studio/home office, but it occurs to me I’ve hardly broached either the why or the how of all that. And I’ve skimped on pictures, too. So let’s fix all that.
The current space looks (more or less) like this:
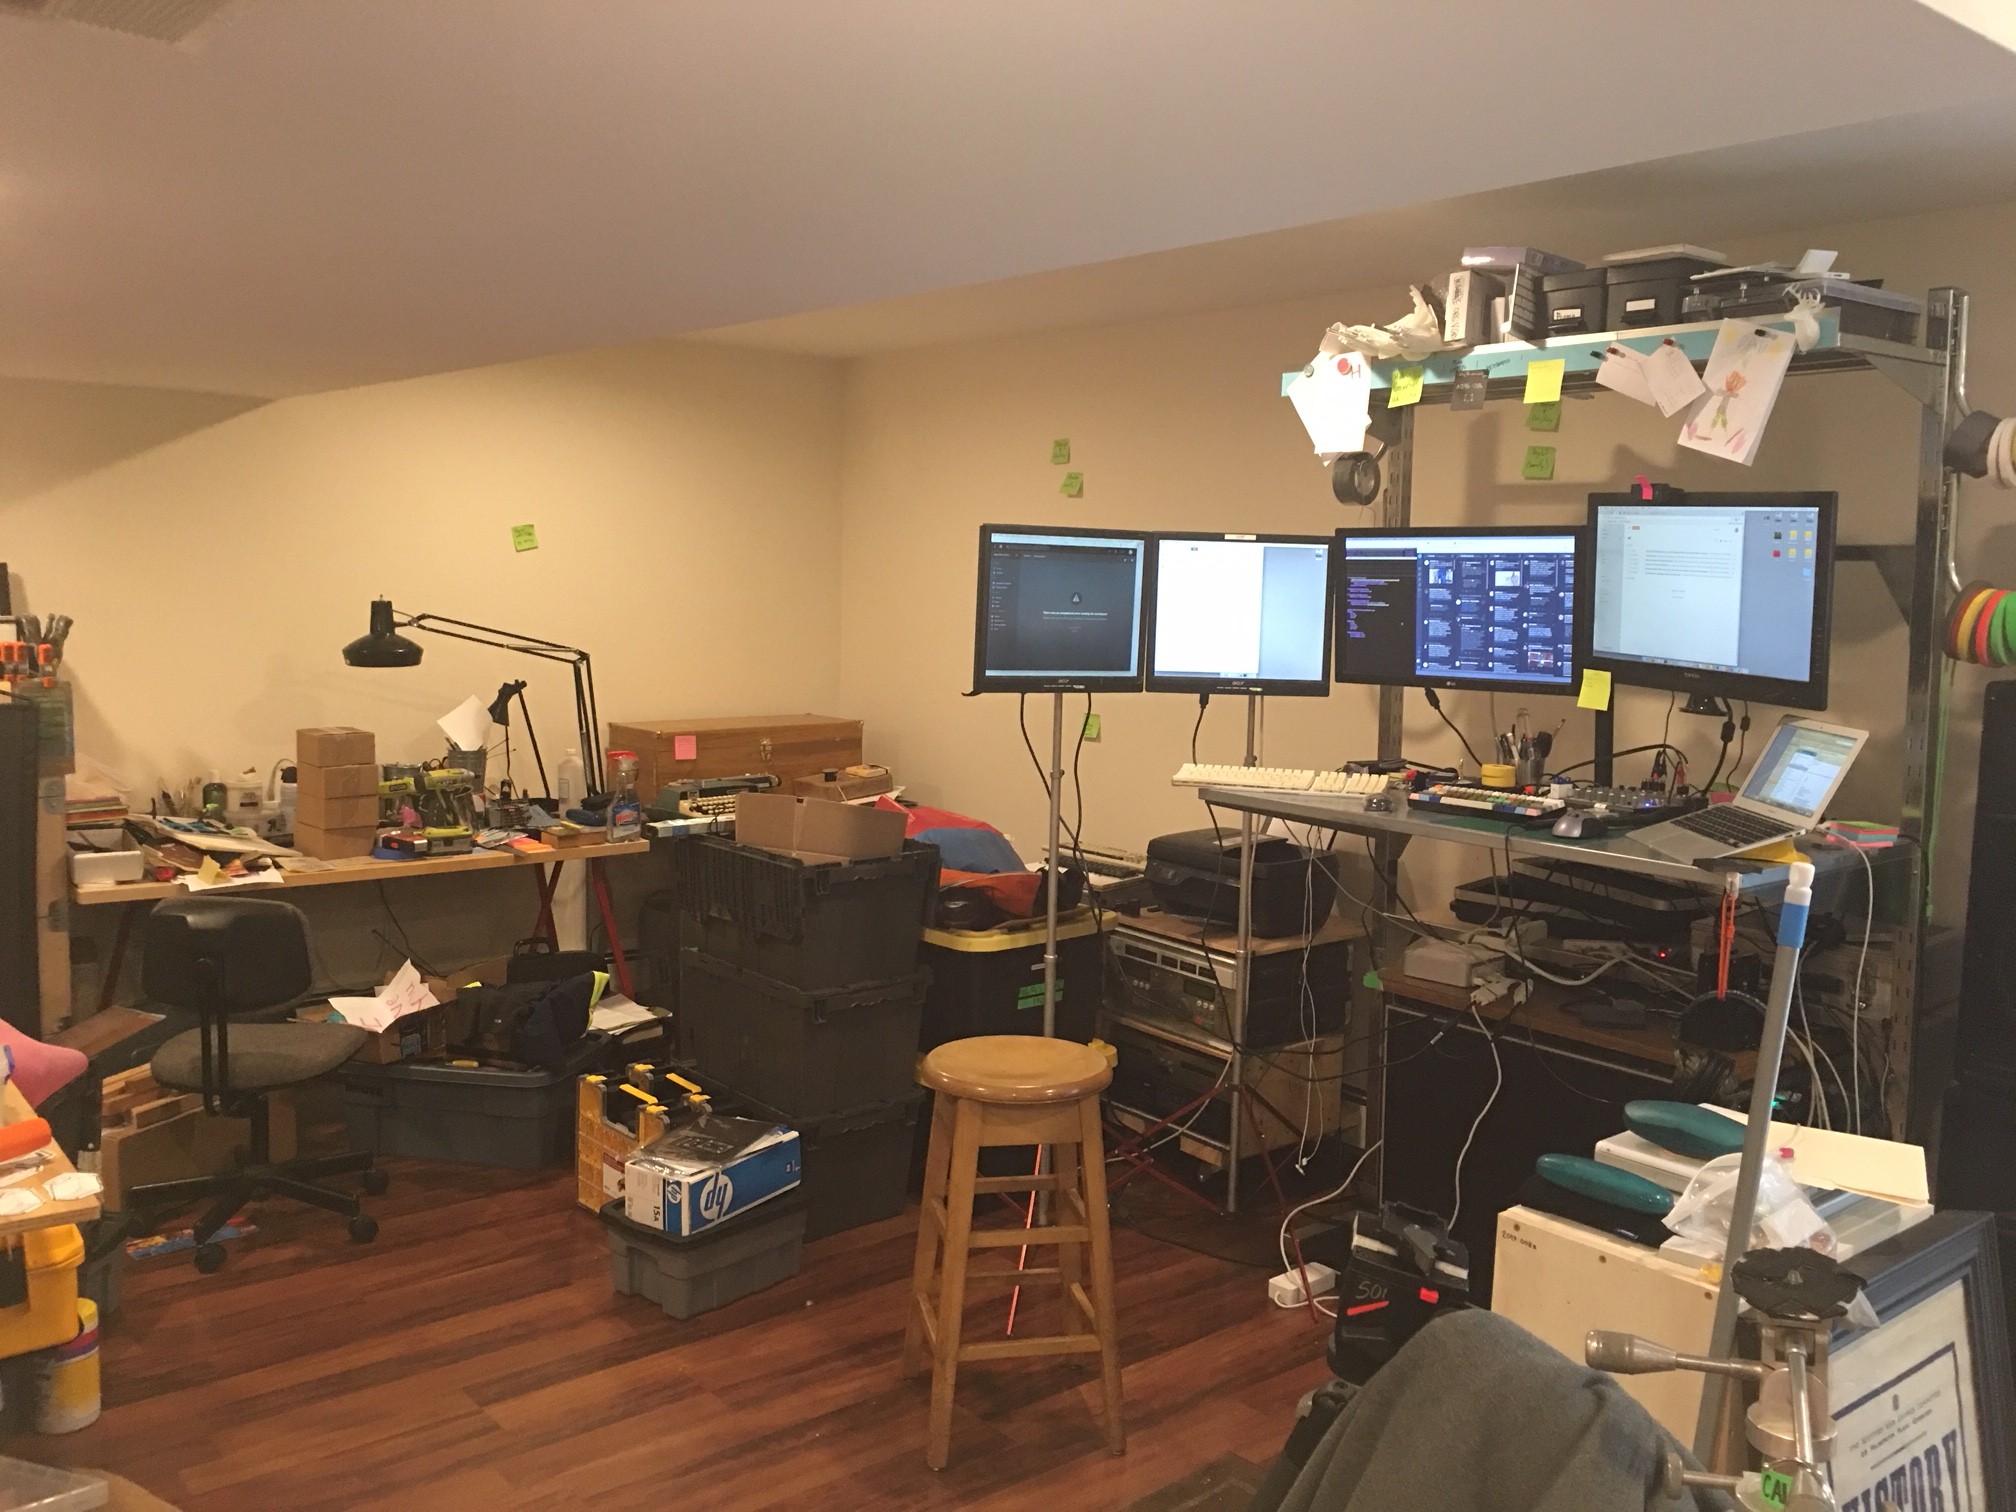
Yowch. That’s not pretty. To be fair, there’s a bunch of stuff prepped in those bins for the install, so it’s a fair bit more cluttered than “normal” right now. But still.
I’ll break down part of what you’re seeing. On the left far wall- that’s all analog stuff. Sewing, typing, book binding, soldering, crafting… all that stuff happens over there somewhere. There’s about eight feet of desk there between the two tables, but it’s crowded and not great. The right side is all digital stuff- that’s some rack gear on the ground, four monitors (for two different machines), and a laptop. And another rack underneath. And it’s a hot mess of cables and clutter. No good.
The plan is something like this (all along the right hand wall):
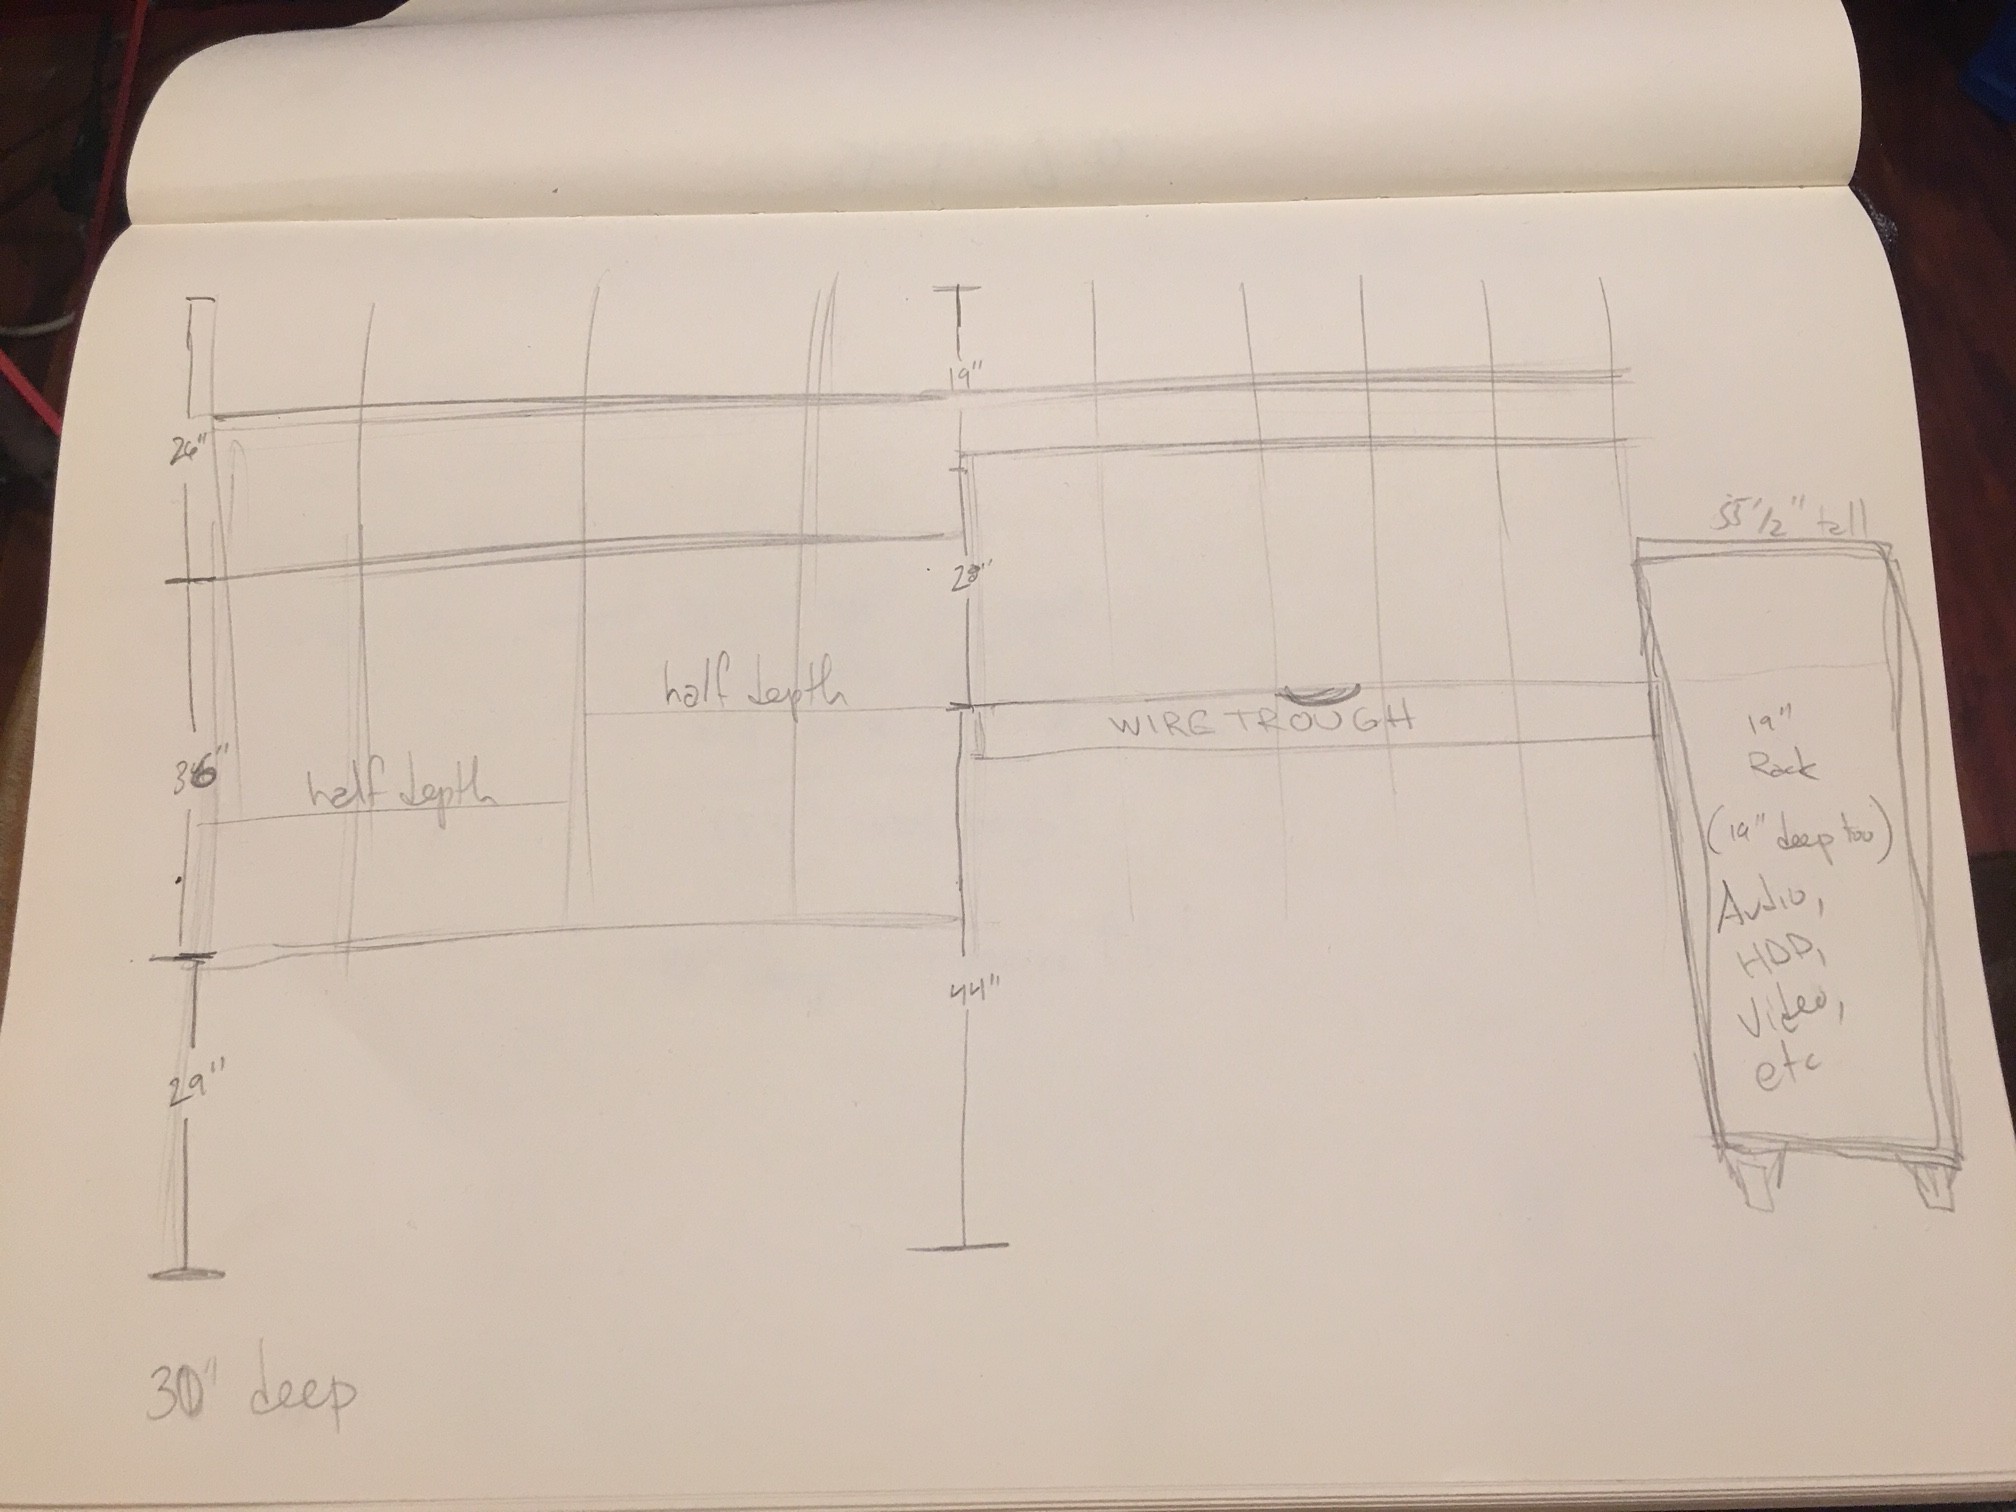
In case you can’t read my writing, that’s two seven foot desks (with a bit of overlap) mounted to the wall, and a freestanding (on casters!) 28u rack on the far right. That extends my computer standing desk from just under four feet wide to seven, and adds a considerable amount of storage above for all the other supplies I need to keep around.
The 28u rack I’ll be building is 30″ deep, too- so it’s going to get all the audio, video, and computer gear I have strewn around. All the hard drives. All the dead media format devices (VHS!) I keep around. All of it, in one place, neatly. Both computers go in there, too, along with (I imagine) the in-the-mail NAS I’m putting together.
I’ve got most of a parts list (and most of the cut-list, too), but I need to take some more measurements and finally do a proper scale drawing of the whole thing (with markings for the studs in the wall) to know exactly how many brackets of which type I need to buy. And then there are a couple of specialty parts (24″ shelf brackets, 28u rack mount rails, etc) that need to be special ordered, so I’ll have to get those en route.
So that’s where I’m at: an hour with the stud finder and some tape away from a full shopping list. Then it’s time to mount stuff to walls, cut and glue a bunch of shelves, and get going on the rack case.